What we'll learn today
- Using crayons library to build user interfaces that fit the Freshworks Design System
- Using crayons to listen to UI events
- Using crayons to update properties or customize CSS rules of specific components programmatically.
What we'll need
- A modern web browser like Google Chrome, Firefox, Edge, or Safari
- A text editor
- Basic knowledge of HTML, CSS, and Javascript
- Crayons Documentation
What we'll build
We will build a static web page to focus on using Crayons components to create sample forms. We will also look into how HTML attributes can be changed and customize CSS rules of components.
Prerequisite Knowledge
- Read the App Introductory Guide
- How to use simple Javascript libraries.
Get the sample code ready
git clone [git@github.com](mailto:git@github.com):freshworks-developers/forms-with-crayons.git
Alternatively,
Verify
- Open the cloned repository in the code editor.
- Open the
events.htmlfile in your preferred web browser. - The tab description simply says Learning Crayons with a blank web page.
- Notice that the template includes crayons scripts in the head tag.
- There are files such as events.html, script.js, and styles.css
We are going to build a simple form with two tabs. Each tab will display different fields to demonstrate various UI events (hence the name, events.html). For now, we will start by laying out a structured skeleton first, and later on, in the following steps, we will focus on interactivity and listening to events associated with each component.
Open events.html
Write the following HTML within the body
<body>
  <section class="main">
    <fw-tabs class="form" active-tab-index="0">
      <fw-tab tab-header="Scooby-Doo">
        <fw-input
          label="Name"
          icon-left="add-contact"
          state-text="Do not enter your user ID"
          state="warning"
          placeholder="Enter your official name"
          required
          clear-input
          class="input"
        >
        </fw-input>
        <fw-select multiple label="Favourite game" required="true" class="select">
          <fw-select-option value="football">Football</fw-select-option>
          <fw-select-option value="cricket">Cricket</fw-select-option>
          <fw-select-option value="hockey">Hockey</fw-select-option>
        </fw-select>
        <fw-label value="Date of Birth" color="green"></fw-label> <br />
        <fw-datepicker date-format="DD-MM-YYYY" class="datepicker"></fw-datepicker> <br />
        <fw-checkbox checked="true" disabled="true" value="TnC" class="checkbox">Terms and Conditions</fw-checkbox>
        <br />
        <fw-dropdown-button searchable label="Choose a city" placeholder="Choose a Metropolitan city" class="dropdown">
          <div slot="dropdown-options">
            <option id="1" value="Chennai">Chennai</option>
            <option id="2" value="Paris">Paris</option>
            <option id="3" value="Washington">Washington</option>
            <option id="4" value="Tokyo">Tokyo</option>
            <option id="5" value="Berlin">Berlin</option>
            <option id="6" value="London">London</option>
          </div>
        </fw-dropdown-button>
        <br />
        <br />
        <fw-radio-group name="Genere" class="radio-group"
          >Genere <br />
          <fw-radio value="Sports" class="radio-button">Sports</fw-radio>
          <fw-radio value="Music" class="radio-button">Music</fw-radio>
          <fw-radio value="Movies" class="radio-button">Movies</fw-radio>
          <fw-radio value="Reels" class="radio-button">Reels</fw-radio>
          <br />
        </fw-radio-group>
        <fw-button color="Primary" class="submit-btn">Submit</fw-button>
        <fw-button color="secondary" class="cancel-btn">Cancel</fw-button> <br />
        <fw-button color="link" class="learn-more-btn" expand>Learn more details</fw-button>
      </fw-tab>
    </fw-tabs>
  </section>
</body>
Write the above HTML code; you will automatically notice a lot of components render in the HTML page as follows:
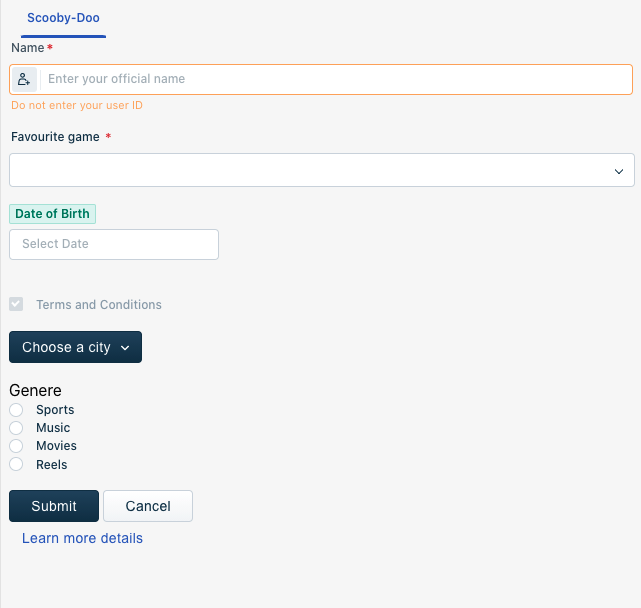
Quickly prototyped with JSBin.com
Let's understand the crux of the above HTML code. Don't forget to open each component's documentation.
- There is tag that crayons allows you wrap in HTML in each
- We are going to build two forms, each wrapped in its own
- There are a couple of more fields
fw-inputfw-selectfw-labelfw-datepickerfw-checkboxfw-dropdown-buttonfw-radio-groupfw-button
Open styles.css
html {
  box-sizing: border-box;
}

*,
*:after,
*:before {
  box-sizing: inherit;
}

body {
  font-size: 0.8rem;
}

.main {
  display: grid;
  grid-template-columns: 1fr 1fr;
  grid-template-rows: 1fr 1fr;
  gap: 0.2rem 0.2rem;
  justify-items: center;
  align-items: center;
  align-content: stretch;
}

.form {
  grid-column: 1 / 2;
  grid-row: 1 /2;
}
The CSS rules of this page will divide the page UI into two vertical equal fractions using a CSS grid. While the left fraction renders Scooby-Doo form, we also want to explore more components under another fw-tab. Let's call it the Boo Boo bear form.
So what does Boo Boo Bear form have?
Open events.html and write the following code under the next fw-tab wrapped under fw-tabs.
<fw-tab tab-header="Boo-Boo Bear">
  <br />
  <fw-textarea label="Text area" state-text="Hint: Avoid using !@#$%^" class="text-area"></fw-textarea>
  <fw-toggle size="small" class="toggle"></fw-toggle> Toggle Button<br /><br />
  <fw-button modal-trigger-id="custom" class="know-btn"> Did you know? </fw-button>
  <fw-modal id="custom" title-text="Modal" icon="bulb" description="using crayons" class="modal" custom-footer>
    You can open up a modal with crayons!
    <span slot="footer">
      <p>You can add footer too</p>
    </span>
  </fw-modal>
  <fw-toast id="toast"></fw-toast>
  <fw-button class="toast-btn">Send a Toast!</fw-button>
</fw-tab>
This form simply has additional crayons components such as follows
fw-textareafw-togglefw-buttonfw-modalfw-toast
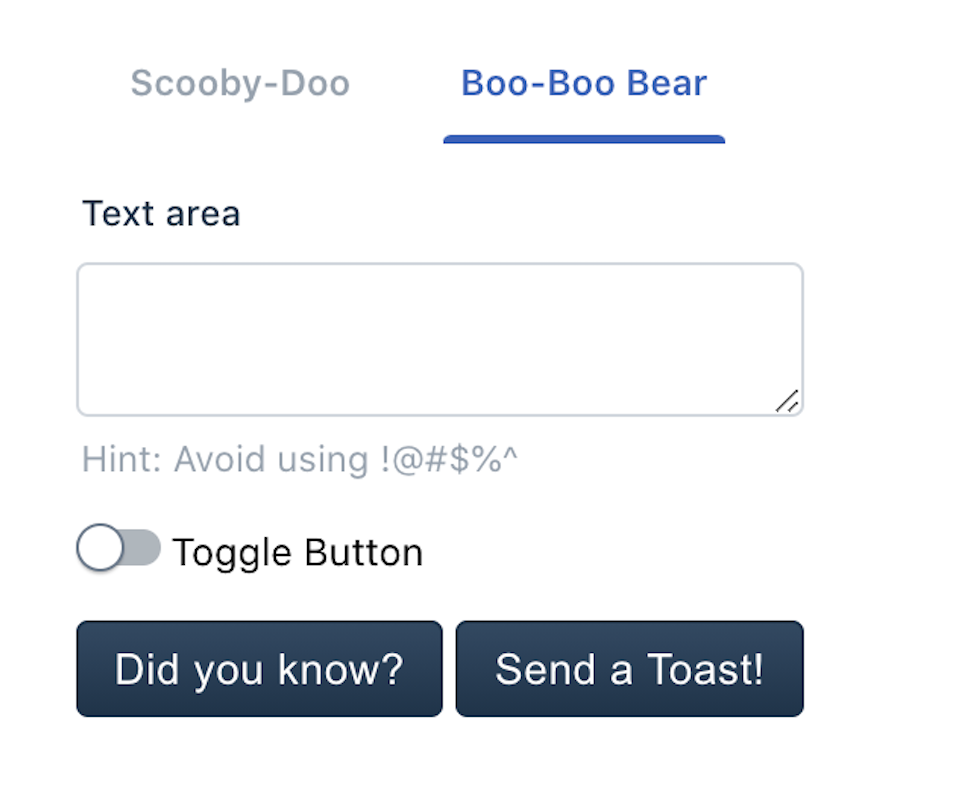
You can find each of these HTML tags in the documentation for reference.
Crux
After you include the crayons library scripts in the HTML page, you can simply start using each component by writing the markup language. Modify attributes and the values assigned to them to impact how crayons render the components in the User Interface.
How to modify DOM elements if the user clicks a button? Do we handle those interactions, listen to those events? And respond to them?
Each crayon component that emits CustomEvent. Javascript can use web APIs to attach callbacks.
For example,
By looking at the fw-button documentation, we can know for every click button emits "fwClick" event. This allows developers to use document.addEventListener("fwClick", function callback(..){});
Goal
In this section,
- To listen to every event on every crayon component.
- Once JS listens to the event, we will write names of events and components sent to the UI.
There are around ~13 components in the Markup language we've just authored. Adding event listeners to all of them and callbacks to all of them would mean a lot of code repetition. Fortunately, Javascript is flexible enough to write this in as few lines as possible.
Linking a Script
At the end of events.html file add the following script tag
The defer attribute will ensure the JS will execute in the order mentioned in the markup language. In our case, at the end of the HTML body tag. This step will help us avoid using document.addEventListener("DOMContentLoaded", or window.onload = in script.js
Logging to UI
Writing names of events and components observed by JS is #2 of the goals of this section. Since we will need to put the HTML placeholder ready before JS runs, let's go ahead and make space for records we wish to write to the UI.
In events.html just below fw-tabs add an article
<article class="observations">
  <fw-spinner size="large" class="spinner"></fw-spinner><br />
  <table>
    <thead>
      <tr>
        <th>Observing...</th>
      </tr>
    </thead>
    <tbody class="table">
      <tr>
        <td><b>Emitted Event </b></td>
        <td><b> Component </b></td>
      </tr>
    </tbody>
  </table>
</article>
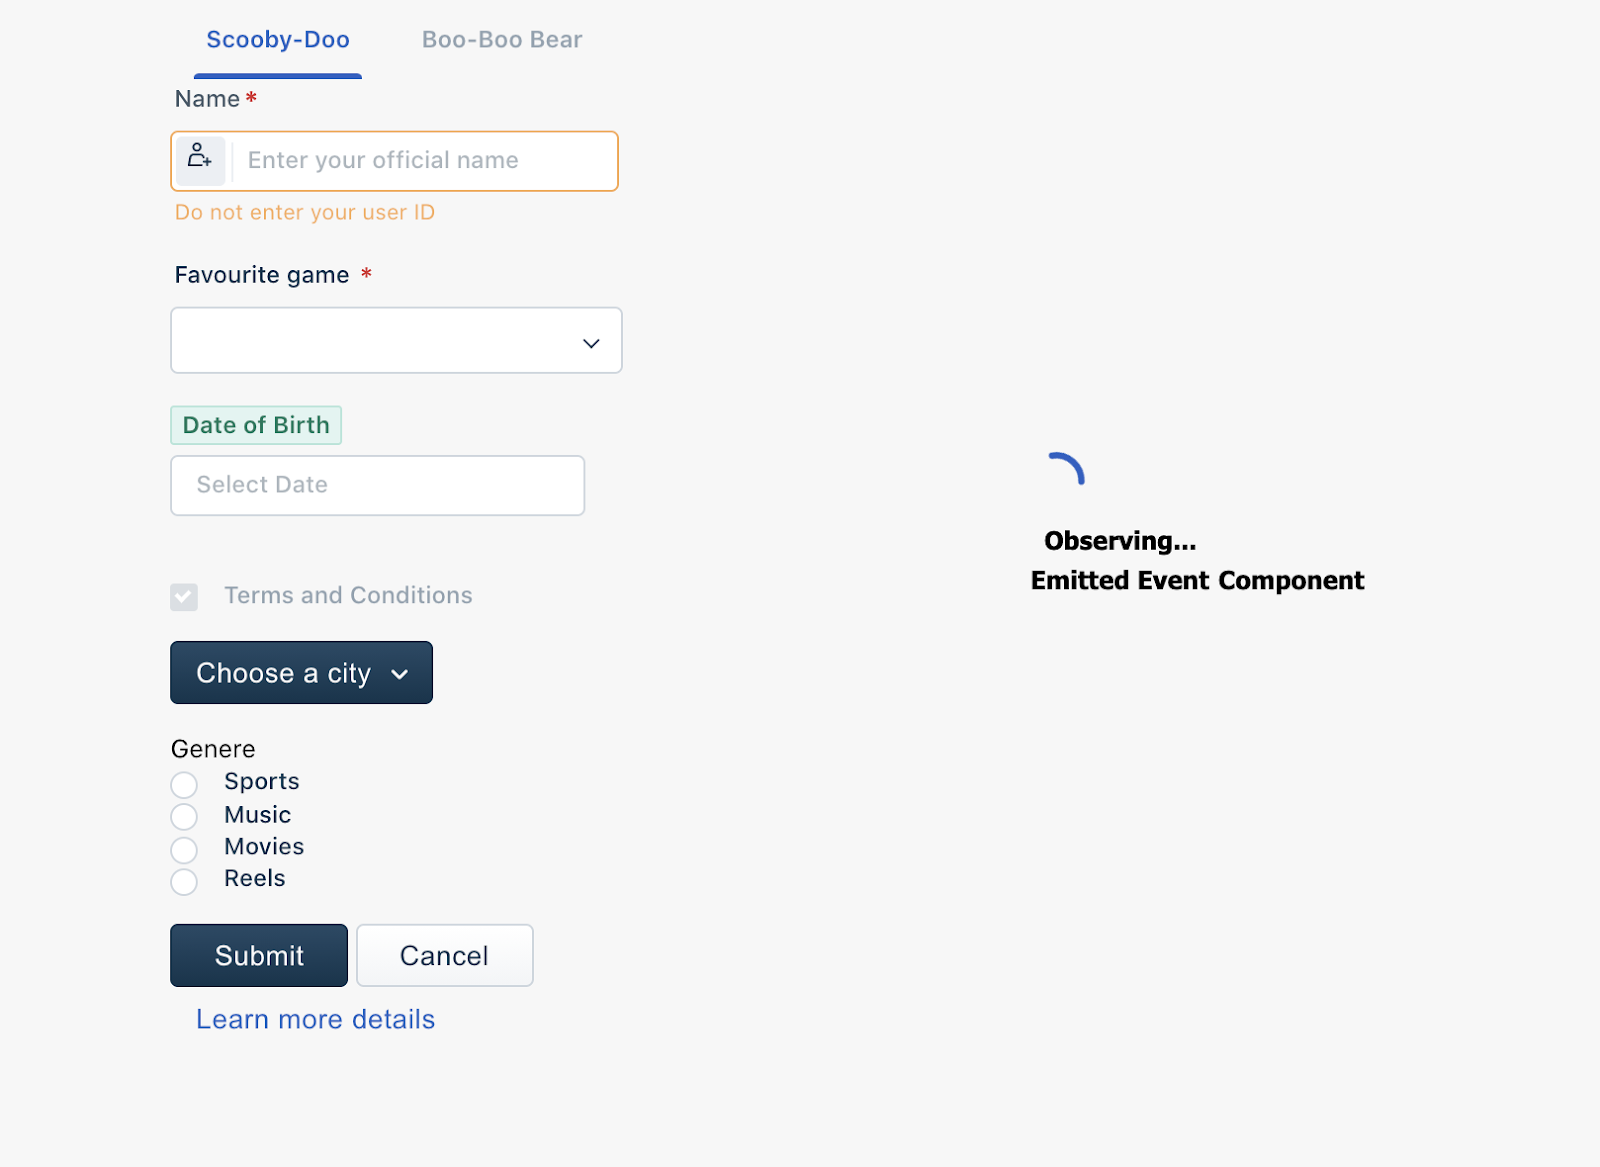
We are just creating a table to append each event's observed information to the UI.
Likewise, add some CSS rules as follows in the styles.css
.observations {
  grid-column: 2/3;
  grid-row: 1 / 2;
  font-family: 'Segoe UI', Tahoma, Geneva, Verdana, sans-serif;
  list-style: none;
}
The above CSS rules will ensure all the rows you append to the table in the future using JS will position on the right-side fraction of the entire web page.
Writing JS
Open script.js
const pick = document.querySelector.bind(document);
const fwEvents = ['fwBlur', 'fwChange', 'fwFocus', 'fwInput', 'fwInputClear', 'fwSelect', 'fwDeselect'];
const logArea = pick('.table');

var scooby_doo_tab = {
  input: pick('.input'),
  select: pick('.select'),
  datepicker: pick('.datepicker'),
  checkbox: pick('.checkbox'),
  dropdown: pick('.dropdown'),
  radioGroup: pick('.radio-group'),
  radioButton: pick('.radio-button'),
  submitBtn: pick('.submit-btn'),
  cancelBtn: pick('.cancel-btn'),
  learnMoreBtn: pick('.learn-more-btn')
};

var boo_boo_tab = {
  textArea: pick('.text-area'),
  toggle: pick('.toggle'),
  knowBtn: pick('.know-btn'),
  toastBtn: pick('.toast-btn')
};
- We are essentially re-labelling
document.querySelector(..)topick(..) fwEventsis an array that stores all the possible Custom Events that any crayon component will emit.scooby_doo_tabandboo_boo_tabare simply two objects that store the key-value pairs of JS DOM objects returned by HTML Elements.
Let's keep going,
Let's try to accomplish this using the Iteration Protocol.`
Why don't we use a for-loop? If we combine properties of both `boo_boo_tab` and `scooby_doo_tab` as a single JS object and try to apply for-loop over it to add event Listener to each component, we may not see the result we want to accomplish. Every property on any field (`submitBtn`, for example) requires invoking `EventTarget.addEventListerner(..)` to attach a callback. When used for-loop to loop through each key in an object. JS doesn't return `EventTarget`(`submitBtn` with DOM methods on it) to access `addEventListener(..)` and attach a callback.
var all_fields = {
  ...scooby_doo_tab,
  ...boo_boo_tab,
  [Symbol.iterator]() {
    let fields = Object.keys(this);
    let count = 0;
    return {
      next: () => {
        if (count < fields.length) {
          let value = this[fields[count]];
          count++;
          return {
            value,
            done: false
          };
        } else {
          return {
            done: true
          };
        }
      }
    };
  }
};

const fields = all_fields[Symbol.iterator]();

var isDone = true;

do {
  var { value: field, done: isDone } = fields.next();

  fwEvents.forEach(listenToScoobyFormField);

  function listenToScoobyFormField(fwEvent) {
    if (field) {
      if (field.isEqualNode(boo_boo_tab.toastBtn)) {
        boo_boo_tab.toastBtn.addEventListener(fwEvent, () => {
          pick('#toast').trigger({ type: 'success', content: 'Cheers! 🍸 ' });
        });
      }

      field.addEventListener(fwEvent, appendOnEventEmit(fwEvent));
    }
  }

  function appendOnEventEmit(fwEvent) {
    return function (event) {
      const row = `
        <tr>
            <td>${fwEvent}</td>
            <td>${event.target.nodeName}</td>
        </tr>
        `;
      logArea.insertAdjacentHTML('beforeend', row);
    };
  }
} while (!isDone);
- The
[Symbol.iterator](){..}property onall_fieldsobject follows the iteration protocol makingall_fiedsobject to be an Iterable. - The fields will hold the return value of the Iterable object that allows fields to have properties such as
nextanddone. - When invoked, the
next(..)returns the field to which we wish to add the event listener doneis a Boolean that tracks if JS has traversed through all Iterable properties.- Finally, using do..while will help you iterate through each property and attach each
fwEventto every field. - We will try to link every
fwEventto every field on bothScooby-DooandBoo Boo Bearforms.appendOnEventEmitis a callback that receives event web API interface as an argument that gives us access to properties like anevent.target.nodeNameto write to UI. - Finally, we will write this information to the UI.
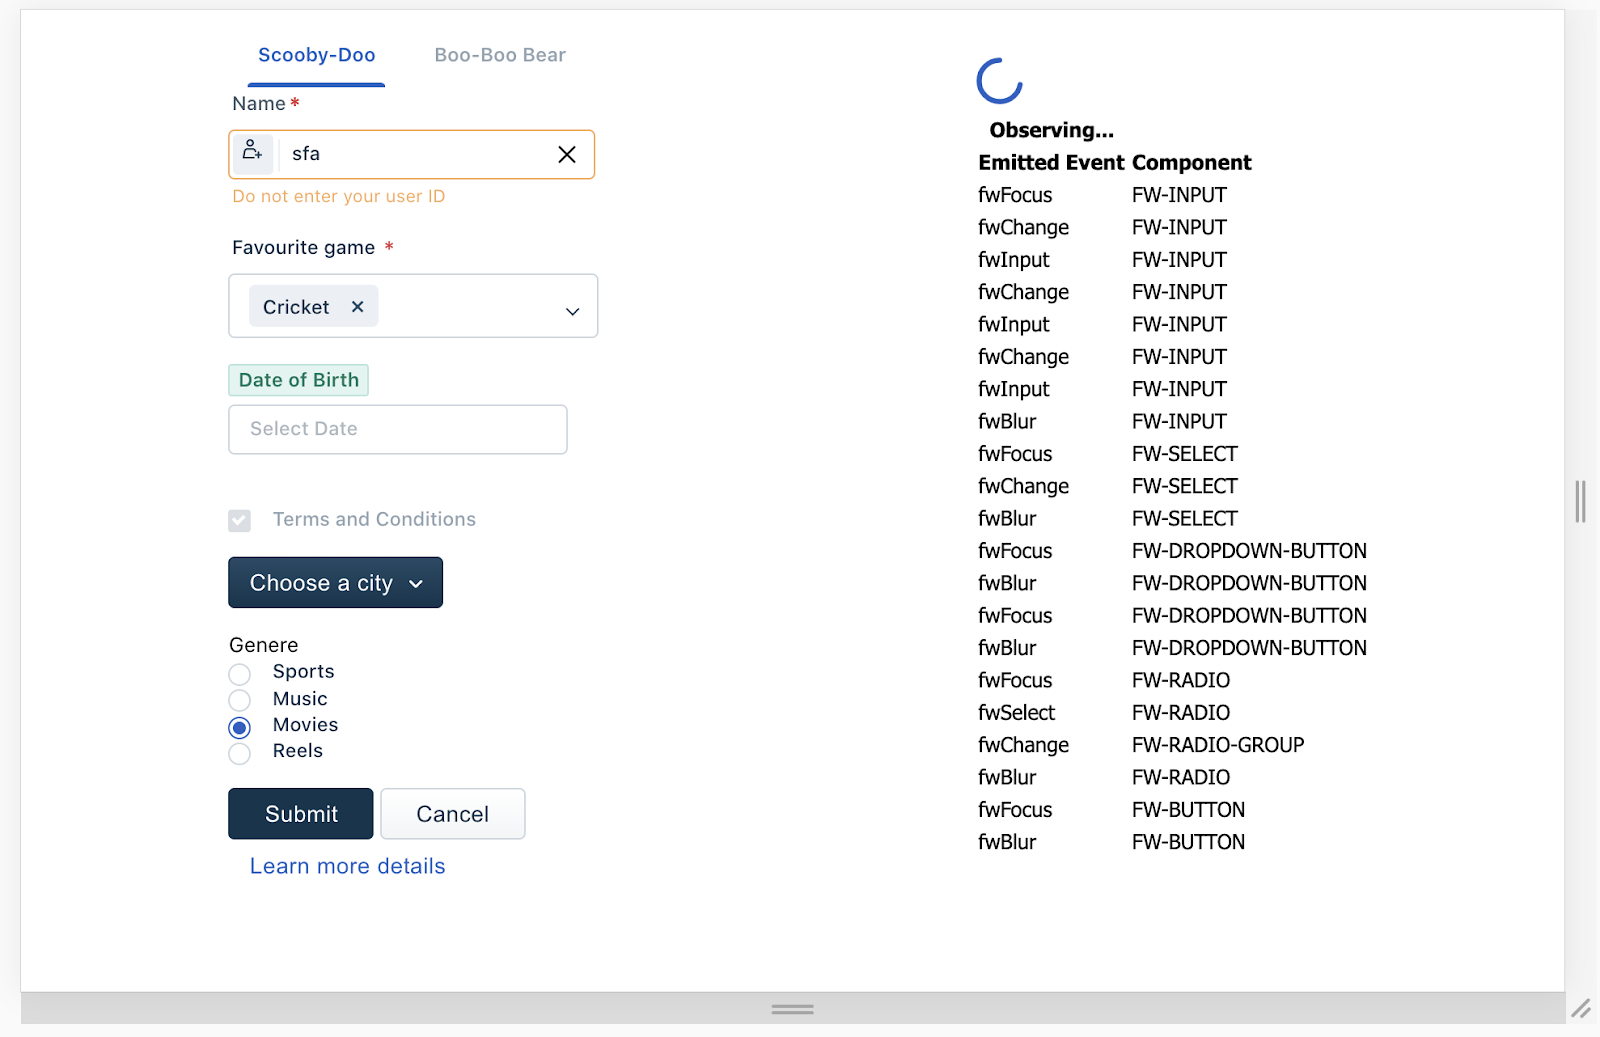
We saw components emitting events. We wrote JS to listen to those events and write the information to UI. Let's go ahead and explore modifying the Component and its CSS properties.
For this, we will create a new HTML page, properties.html
Start writing the following code,
<!DOCTYPE html>
<html lang="en">
  <head>
    <meta charset="UTF-8" />
    <meta http-equiv="X-UA-Compatible" content="IE=edge" />
    <meta name="viewport" content="width=device-width, initial-scale=1.0" />
    <script async type="module" src="https://unpkg.com/@freshworks/crayons/dist/crayons/crayons.esm.js"></script>
    <script async nomodule src="https://unpkg.com/@freshworks/crayons/dist/crayons/crayons.js"></script>

    <title>Properties</title>
  </head>

  <body></body>

  <style></style>
  <script defer></script>
</html>
- Add crayons library by including the script tags. The async attribute loads the JS library independent of the order of page renders. It helps crayons UI to be applied to the components whenever JS is fully loaded to the browser.
- As a result of this effect, the HTML renders first without before crayons UI is applied. It is better for the user experience by showing content first without having the user wait until the library fully loads. Useful, especially in low internet connections.
- Notice script tag and style tag. We will write CSS rules and JS on the same HTML page due to the shortcode and convenience to learn.
Let's start laying out the components in the UI
In the body of properties.html
In the body of properties.html
<body>
  <h3>fw-input</h3>
  <section>
    <fw-input label="Name" icon-left="add-contact" placeholder="Enter your official name" class="name" required>
    </fw-input>
    <fw-input label="Password" state-text="Password is incorrect" state="error" class="password" required clear-input>
    </fw-input>
  </section>

  <fw-dropdown-button label="Choose the sport" color="secondary">
    <div slot="dropdown-options">
      <option id="1" value="Cricket">Cricket</option>
      <option id="2" value="Football">Football</option>
      <option id="3" value="Hockey">Hockey</option>
    </div>
  </fw-dropdown-button>
  <p></p>
  <fw-button type="reset" class="focusBtn" color="danger"
    >Abraca Dabra
    <fw-icon name="items" size="10" color="white"></fw-icon>
  </fw-button>
  <section class="log-area"></section>
</body>

<style>
  body {
    display: flex;
    flex-flow: column wrap;
    align-items: center;
  }
</style>
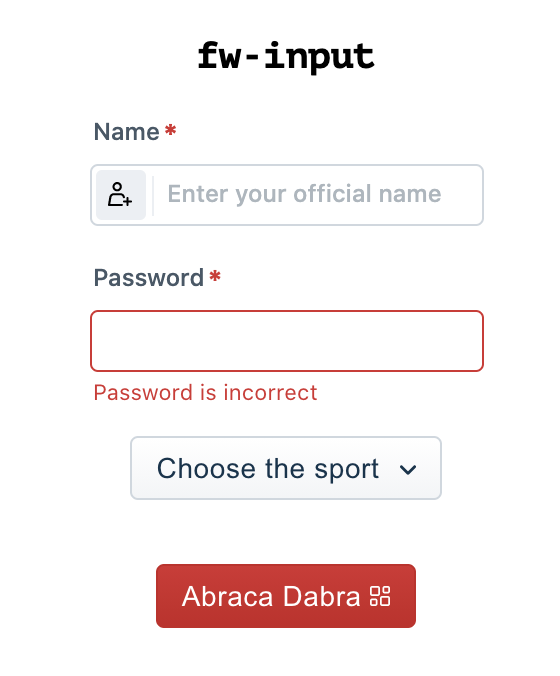
This will render:
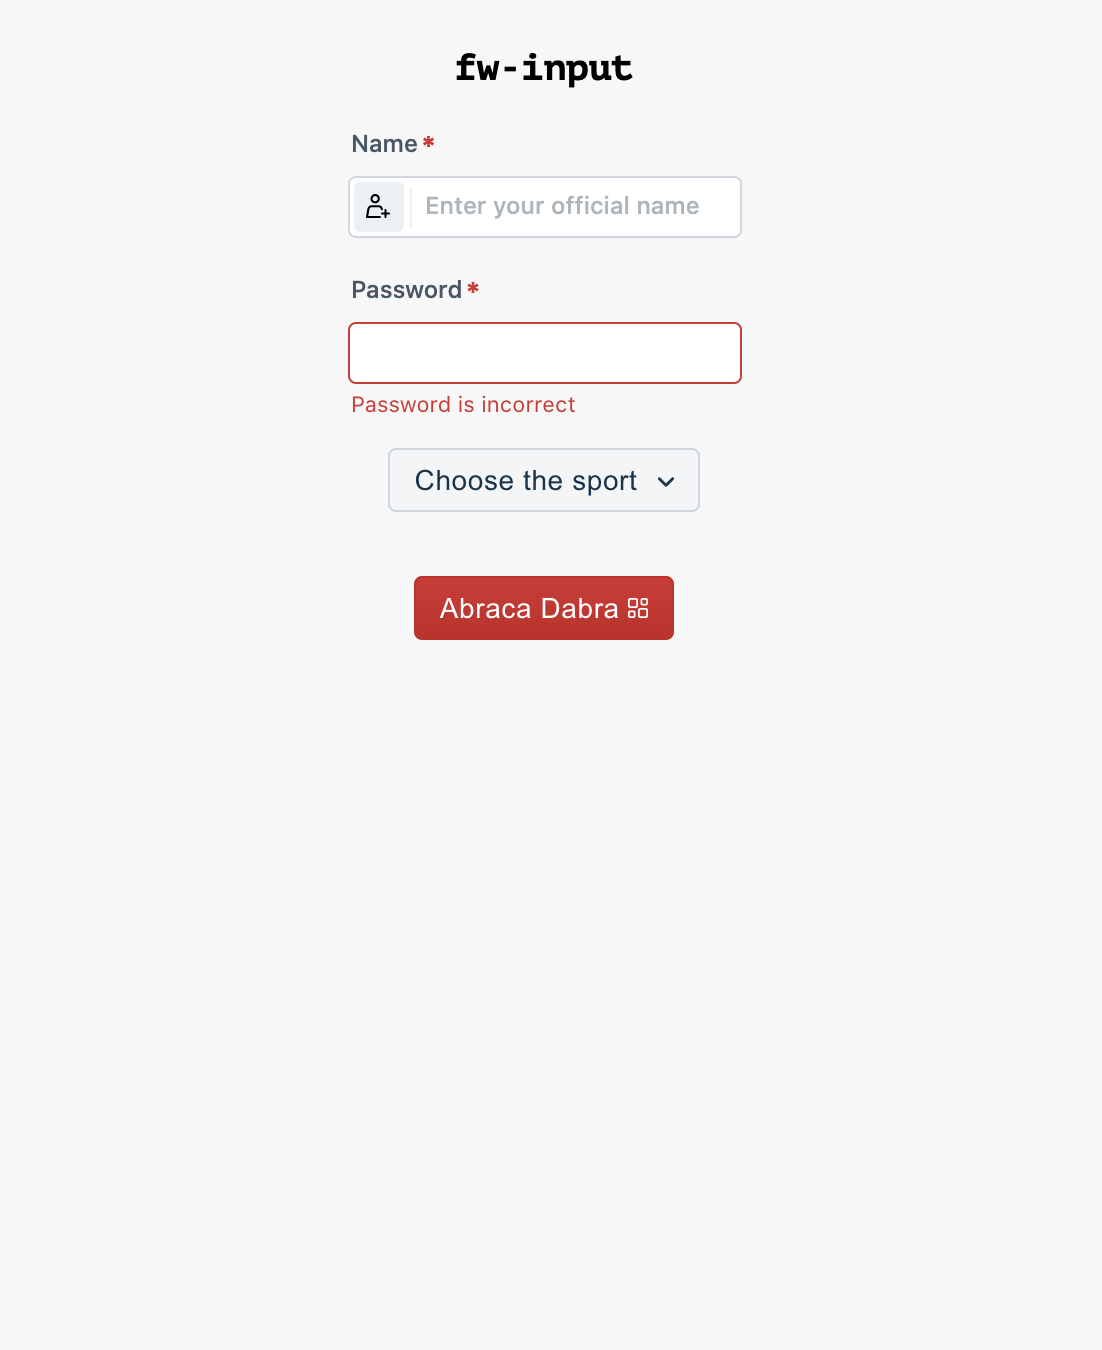
- It simply has two input fields, a dropdown menu, and a button.
- All of these components are nicely centered. Thanks to CSS Flexbox.
- Notice that there is a section tag to append any information, just like how we wrote a report to the UI.
Component properties
Move to script tag in properties.html
We will change the behavior of the components using JS as an example in this learning exercise. Similarly, you can alter the behavior as required to other crayon components according to the business use case of the app.
const pick = document.querySelector.bind(document);
const [nameElement, pwdElement, focusBtn] = [pick('.name'), pick('.password'), pick('.focusBtn')];

focusBtn.addEventListener('fwClick', async function getFocus() {
  nameElement.value = 'random-string';
  nameElement.state = 'warning';
  nameElement.clearInput = true;
  nameElement.placeholder = 'placeholder-text';
  pwdElement.readonly = false;
  pwdElement.state = 'normal';
  await pwdElement.setFocus();
});
- We listen to the button click and write code that will change the behavior of the component.
- There two elements
nameElementandpwdElement. As the properties suggest,nameElementwill holdrandom-stringthe field indicates a warning UX and clears any Input given by the user.pwdElementsimply turns into read-only and moves back to ordinary UX rather than providing the error UX.
- Finally, some fields support methods on them as well. In our case,
pwdElement.setFocus()will help the user focus on the password field alone.
CSS properties
While crayons allow you to alter the behavior of the components, alter the style using custom CSS properties.
Let go ahead and do a simple thing – Change the font size to 20px in the dropdown menu
Add the following code in a style tag
fw-dropdown-button {
  --dropdown-font-size: 20px;
}
The result
Kudos for completing this tutorial
We have covered a comprehensive map of the crayons library. JS library-like crayons is a bundle of web components so that you can use them complementary with your favorite frameworks in any of your projects.
See the final source code of the app
Always have the documentation handy!