Freshworks developer platform now supports React local development natively in the FDK through Webpack 5. This tutorial is intended to walk you through the implementation and assist you in building your first react app using FDK.
Implementation
The FDK comes built-in with Webpack 5 and a Webpack configuration file to mount during the compilation and the build phases, whenever the FDK detects the project is developed with React, the project is compiled using the Webpack with default Webpack configuration.
Positive : Though the FDK has a default Webpack configuration for React apps, It is possible to provide custom configurations, you can follow this tutorial to create your custom webpack config.
Prerequisites
- Familiarity with Freshworks app development.
- FDK version 6.10.0+
- Experience with React app development.
What we'll build today?
In this tutorial we will extend the your_first_react_app template and build a react app that uses the data method fetch ticket details and display information through showNotify method.
To create a new React project,
- Update the FDK to the latest version(v6.10.0+).
- Create a new folder named my_app and open the terminal/command prompt inside the newly created folder
vel@freshworks:~$ mkdir my_app && cd my_app
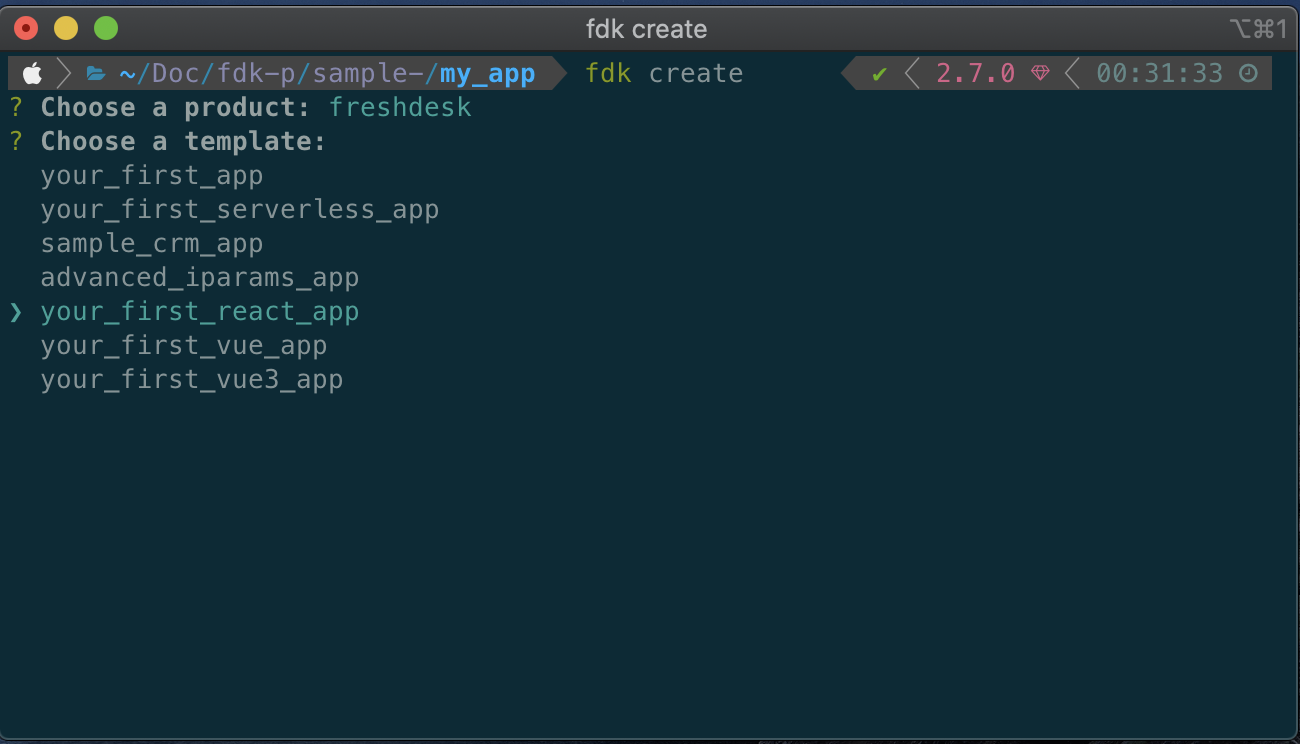
- Run fdk create and select the product of your choice.
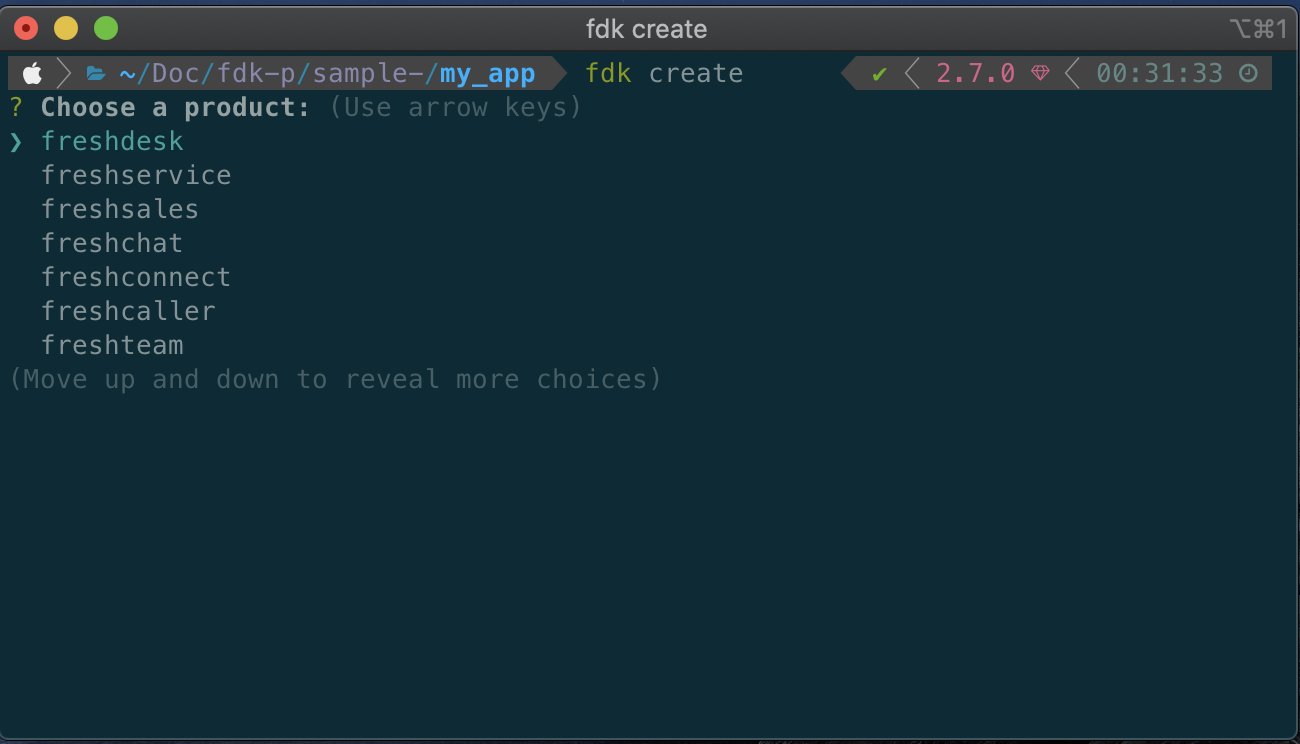
- Once you have chosen the desired product and select your_first_react_app template.
- After creating the project, run npm install to install all the dependencies and devDependencies.
vel@freshworks:~/my_app$ npm install
- Once the dependencies are installed, you can run the app using the fdk run command.
vel@freshworks:~/my_app$ fdk run
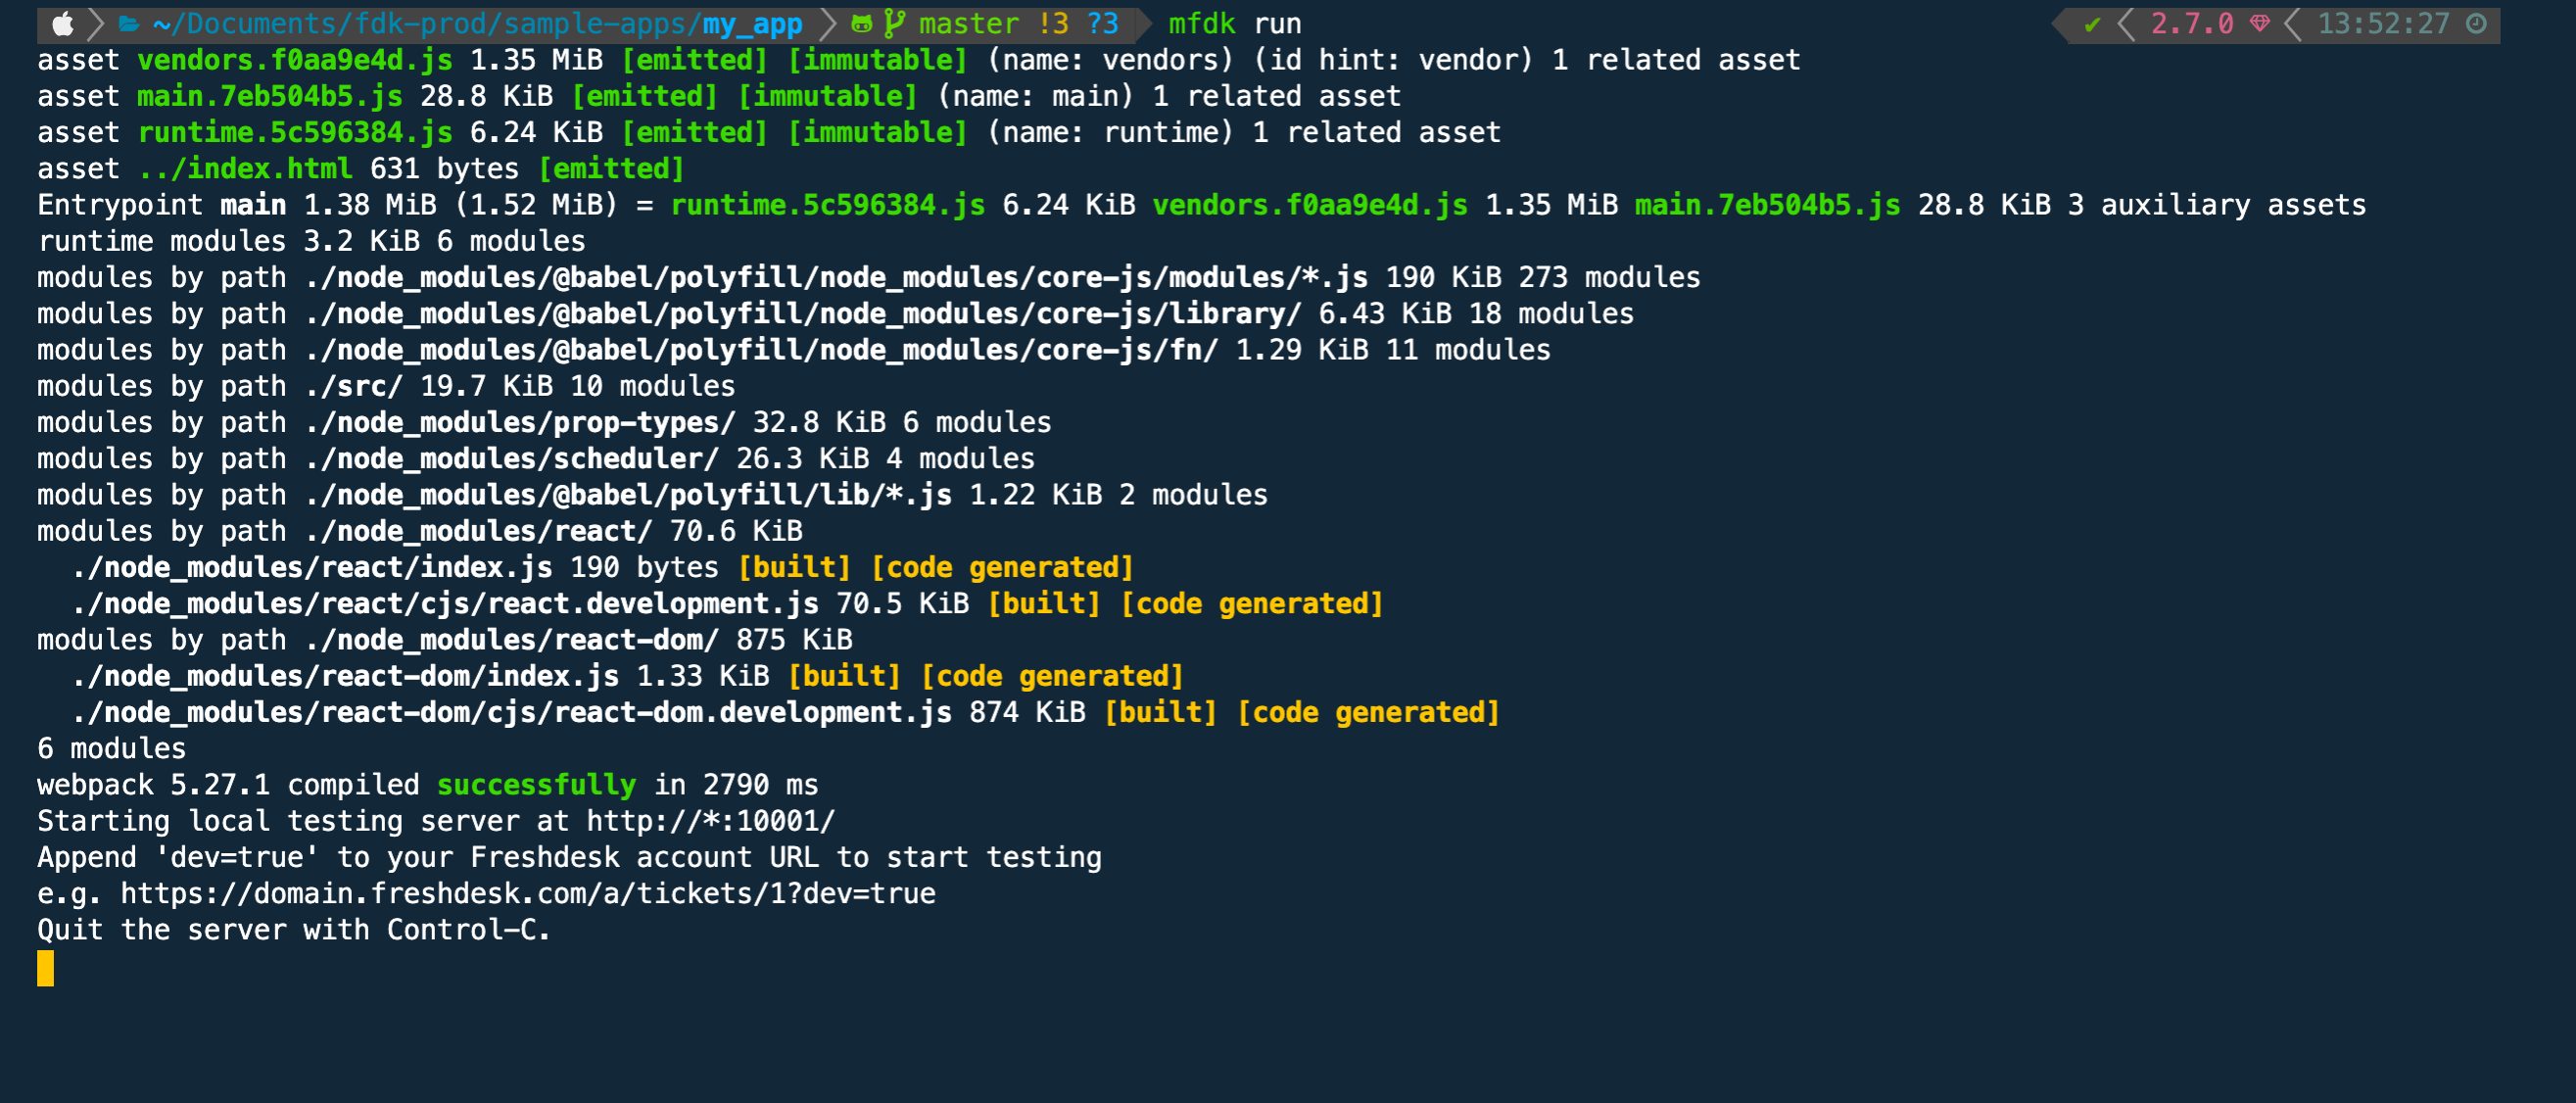
- Open the ticket details page with
?dev=trueafter the localhost is started with the above message.
From the above Screenshot, we can see that the react app is running successfully.
The React App in the Freshworks ecosystem is similar to the React app created using create-react-app or a React app bundled using the Webpack, with some minor changes in the folder structure to support integration with the FDK.
The folder structure of the React app is explained below
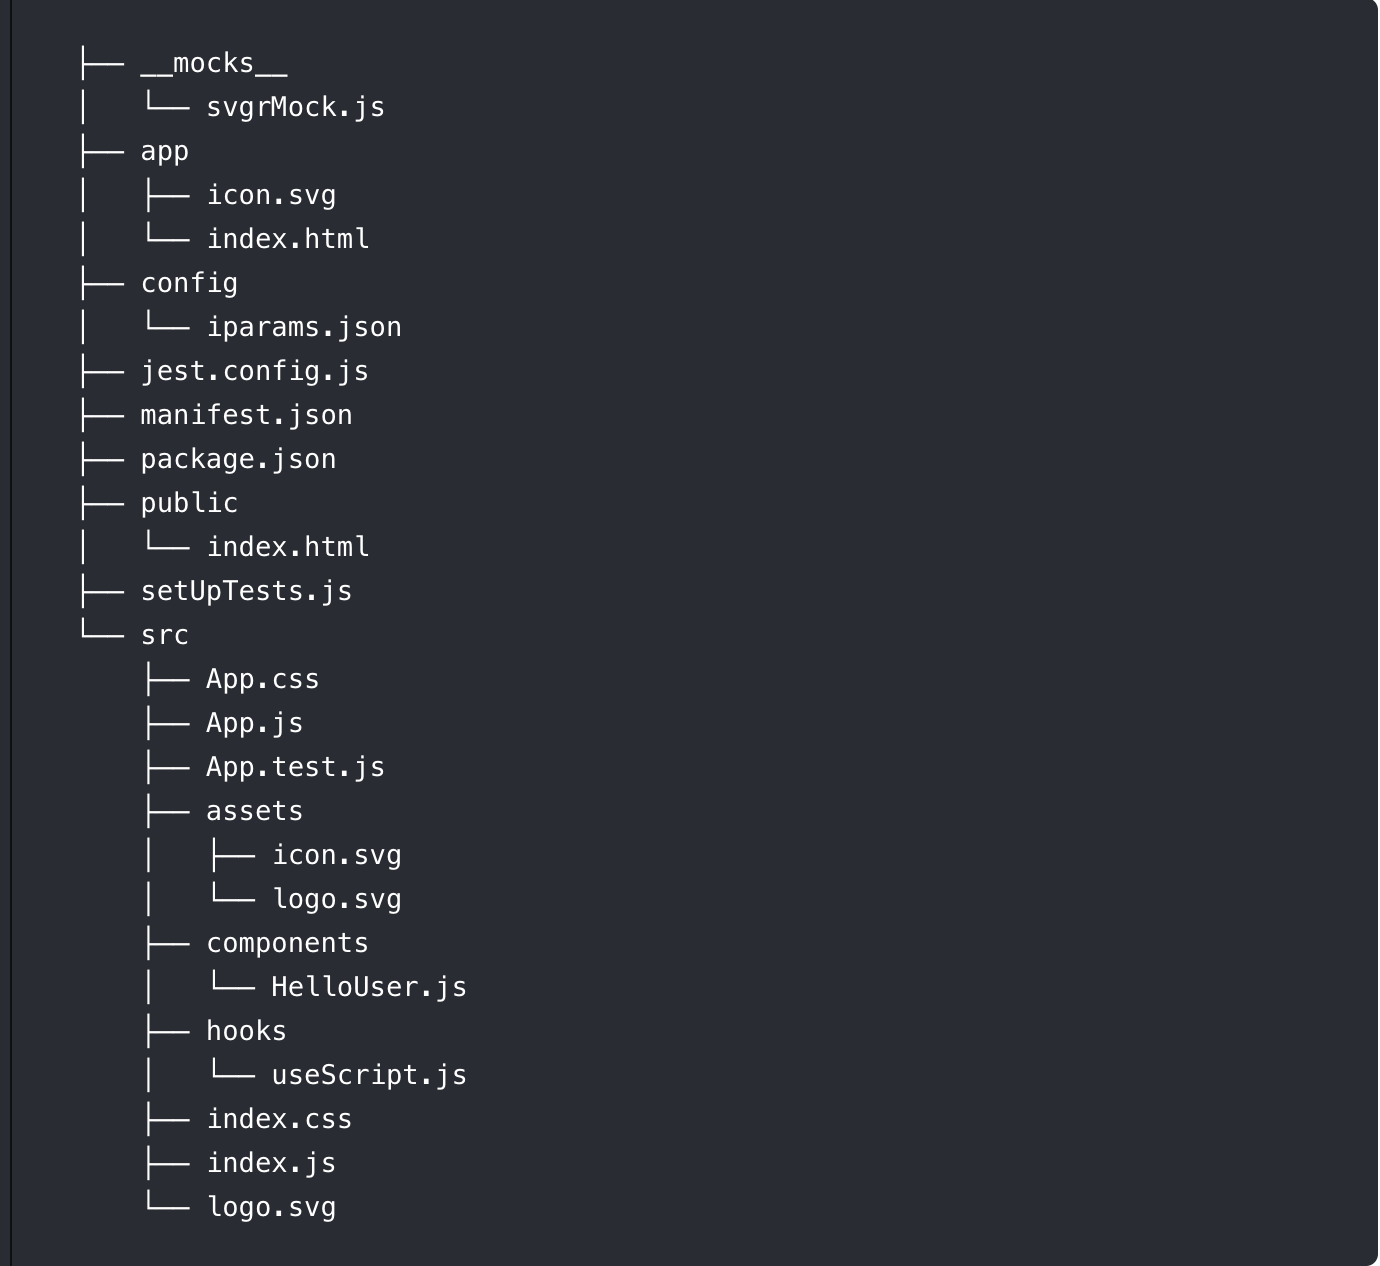
The manifest.json file
The manifest.json file contains the app metadata about your app, such as app locations, platform version, and other app related information
The package.json file
The package.json file contains the information about the framework used in the app, the dependencies, and devDependencies used by the app, and configurations if any.
The app folder
The app folder contains the built/compiled assets of the app. The content of the app folder is served by the FDK in http://localhost:10001/iframe during fdk run
Negative : * Do not delete, replace or modify the index.html file inside the app folder, any changes made will be overwritten during the build. If you need to add or remove anything in the app/index.html, make sure you do it in public/index.html as it serves as the template file for app/index.html
- Replace the
icon.svgfile in the app folder, if you choose to use a custom icon for the app. Make sure you change the name of the icon inmanifest.jsonto the replaced/newly added image. - If you choose to use a custom Webpack config, make sure the output always points to the app folder or its subfolders.
The Config folder
The config folder contains the installation parameter of the app.
Negative : Do not define your custom webpack config inside the config folder
The src folder
The src folder contains your react components and services.
The public folder
The public folder contains an index.html file which serves as a template to the app/index.html. Adding CSS or scripts to the app can be done in the public/index.html.
The jest.config.js file
The jest.config.js contains the configurations related to jest unit tests. Alternatively, this can be directly defined in the package.json like shown below.
package.json
  "scripts": {
    "test": "jest test --coverage"
  },
  "jest": {
    "roots": [
      "./app/src"
    ]
  }
The setUpTests.js file
The setupTests.js is needed when your app uses a browser API that you need to mock in your tests or if you need a global setup before running your tests, It will be automatically executed before running your tests.
To know more about setupTests.js, please visit this link
The __mocks__ folder
The __mocks__ folder contains all the manual mocks required by jest as per jest's naming convention.
Please visit this link to know more about __mocks__
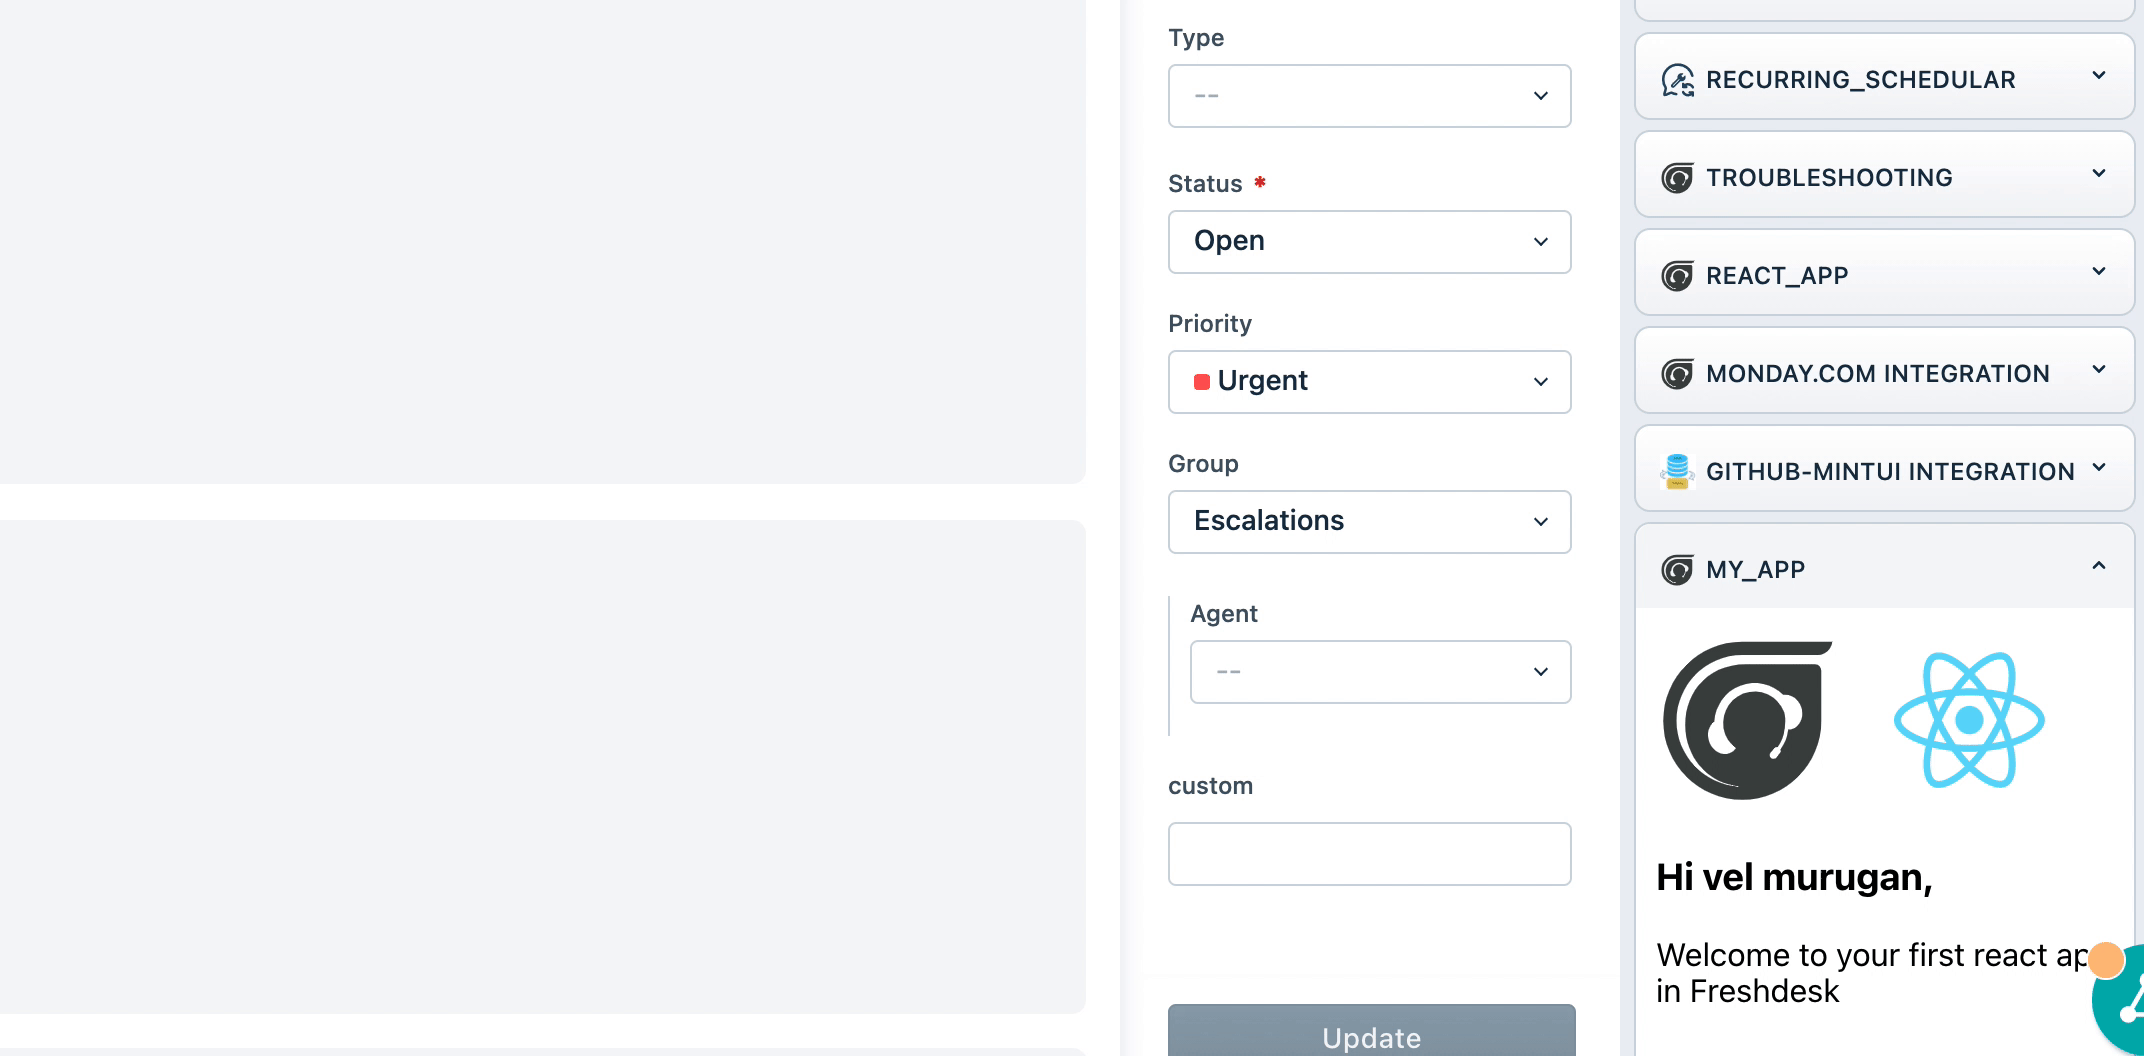
Now that we have the template up and running for the React app without any errors, let us start building an app that uses Data method and Interface method.
Let's edit the src/components/HelloUser.js to display a button, which on click displays a notification bar with Ticket ID and Agent Name.
Adding the button.
Add a button to component inside the return function
  return (
    <div>
      <button>Show Details</button>
    </div>
  )
Create a new function to display the notification. The interface method can be accessed via the client object passed as a prop from the App.js component. The HelloUser.js component adding functions to display ticket details is shown below.
import React from 'react'
import PropTypes from 'prop-types'


const HelloUser = ({ client }) => {

  const showDetails = () => {
    client.data.get("ticket").then(
      function (data) {
        showNotification(`The ticket ${data.ticket.id} with the subject ${data.ticket.subject} is created by the contact ${data.ticket.requester_id}`);
      },
      function (error) {
        console.log("error", error);
      }
    );
  }

  const showNotification = (message) => {
    client.interface.trigger("showNotify", {
      type: "success",
      message: message
    })
  }

  return (
    <div>
      <button onClick={showDetails}>Show Details</button>
    </div>
  )
}

HelloUser.propTypes = {
  client: PropTypes.object
}
export default HelloUser
Once the necessary changes are made to the HelloUser.js component, the app should work as shown in the GIF below.
Once the app is done, the app can be packed like anyother FDK app using fdk pack command
Since the integration is in the early stages, there are few cavets that you need to keep in mind
- The integration officialy works for react functuional components, It may or may not support class based componenets.
- Currently,
fdk validateis not supported for single page applications, although you can easily write your own eslint config. - Due to restrictions with the FDK, browsers, and node v10, you cannot use ES6 features, this will be resolved very soon when the FDK supports node v12.
In this Tutorial we learned about,
✅ Creating a react app using FDK ✅ Using the platform features in the react app.
What's next?
Now that you are familiar with creating a basic react app using FDK, you can start adding more complex react features like router, context API, and state management.