Interface-methods is a mechanism that the developer platform provides, to enable your app to trigger certain actions on the Freshworks product UI.
- Using interface methods an app that is deployed in the global left-navigation pane can display certain UI elements such as Modals, Confirmation boxes, and Notifications.
- Mimic click actions - such as closing modals.
Common interfaces
Your app can trigger these interface actions irrespective of the placeholder where the app is deployed.
Display modals
From your project’s root, navigate to the app directory and create a <modal or any-reasonable-name>.html file. In this file, enter the code to render the (front-end of the) .
Navigate to the app.js file. Subscribe to the app.initialized event, through an event listener. When the app is initialized, the parent application (the product on which the app is deployed) passes a client reference to the app.
After app initialization, to display a , use the following method:
Sample app.jsclient.interface.trigger("showModal", { title: "<Modal name>", template: "<path to the modal.html file>" })
showModal method
The method displays a Modal in an IFrame. Events methods and Interface methods are not supported in a Modal - your app cannot react to click, change, or update events that occur inside a Modal and your app cannot trigger actions on the product UI from the Modal.
Installation parameters, Request method, Data method, and Data storage are supported in modals. If your app uses these methods from modals, in the modal.html file (or in any other equivalent file that you have added), ensure to include the following appclient resource.
<script src="{{{appclient}}}"></script>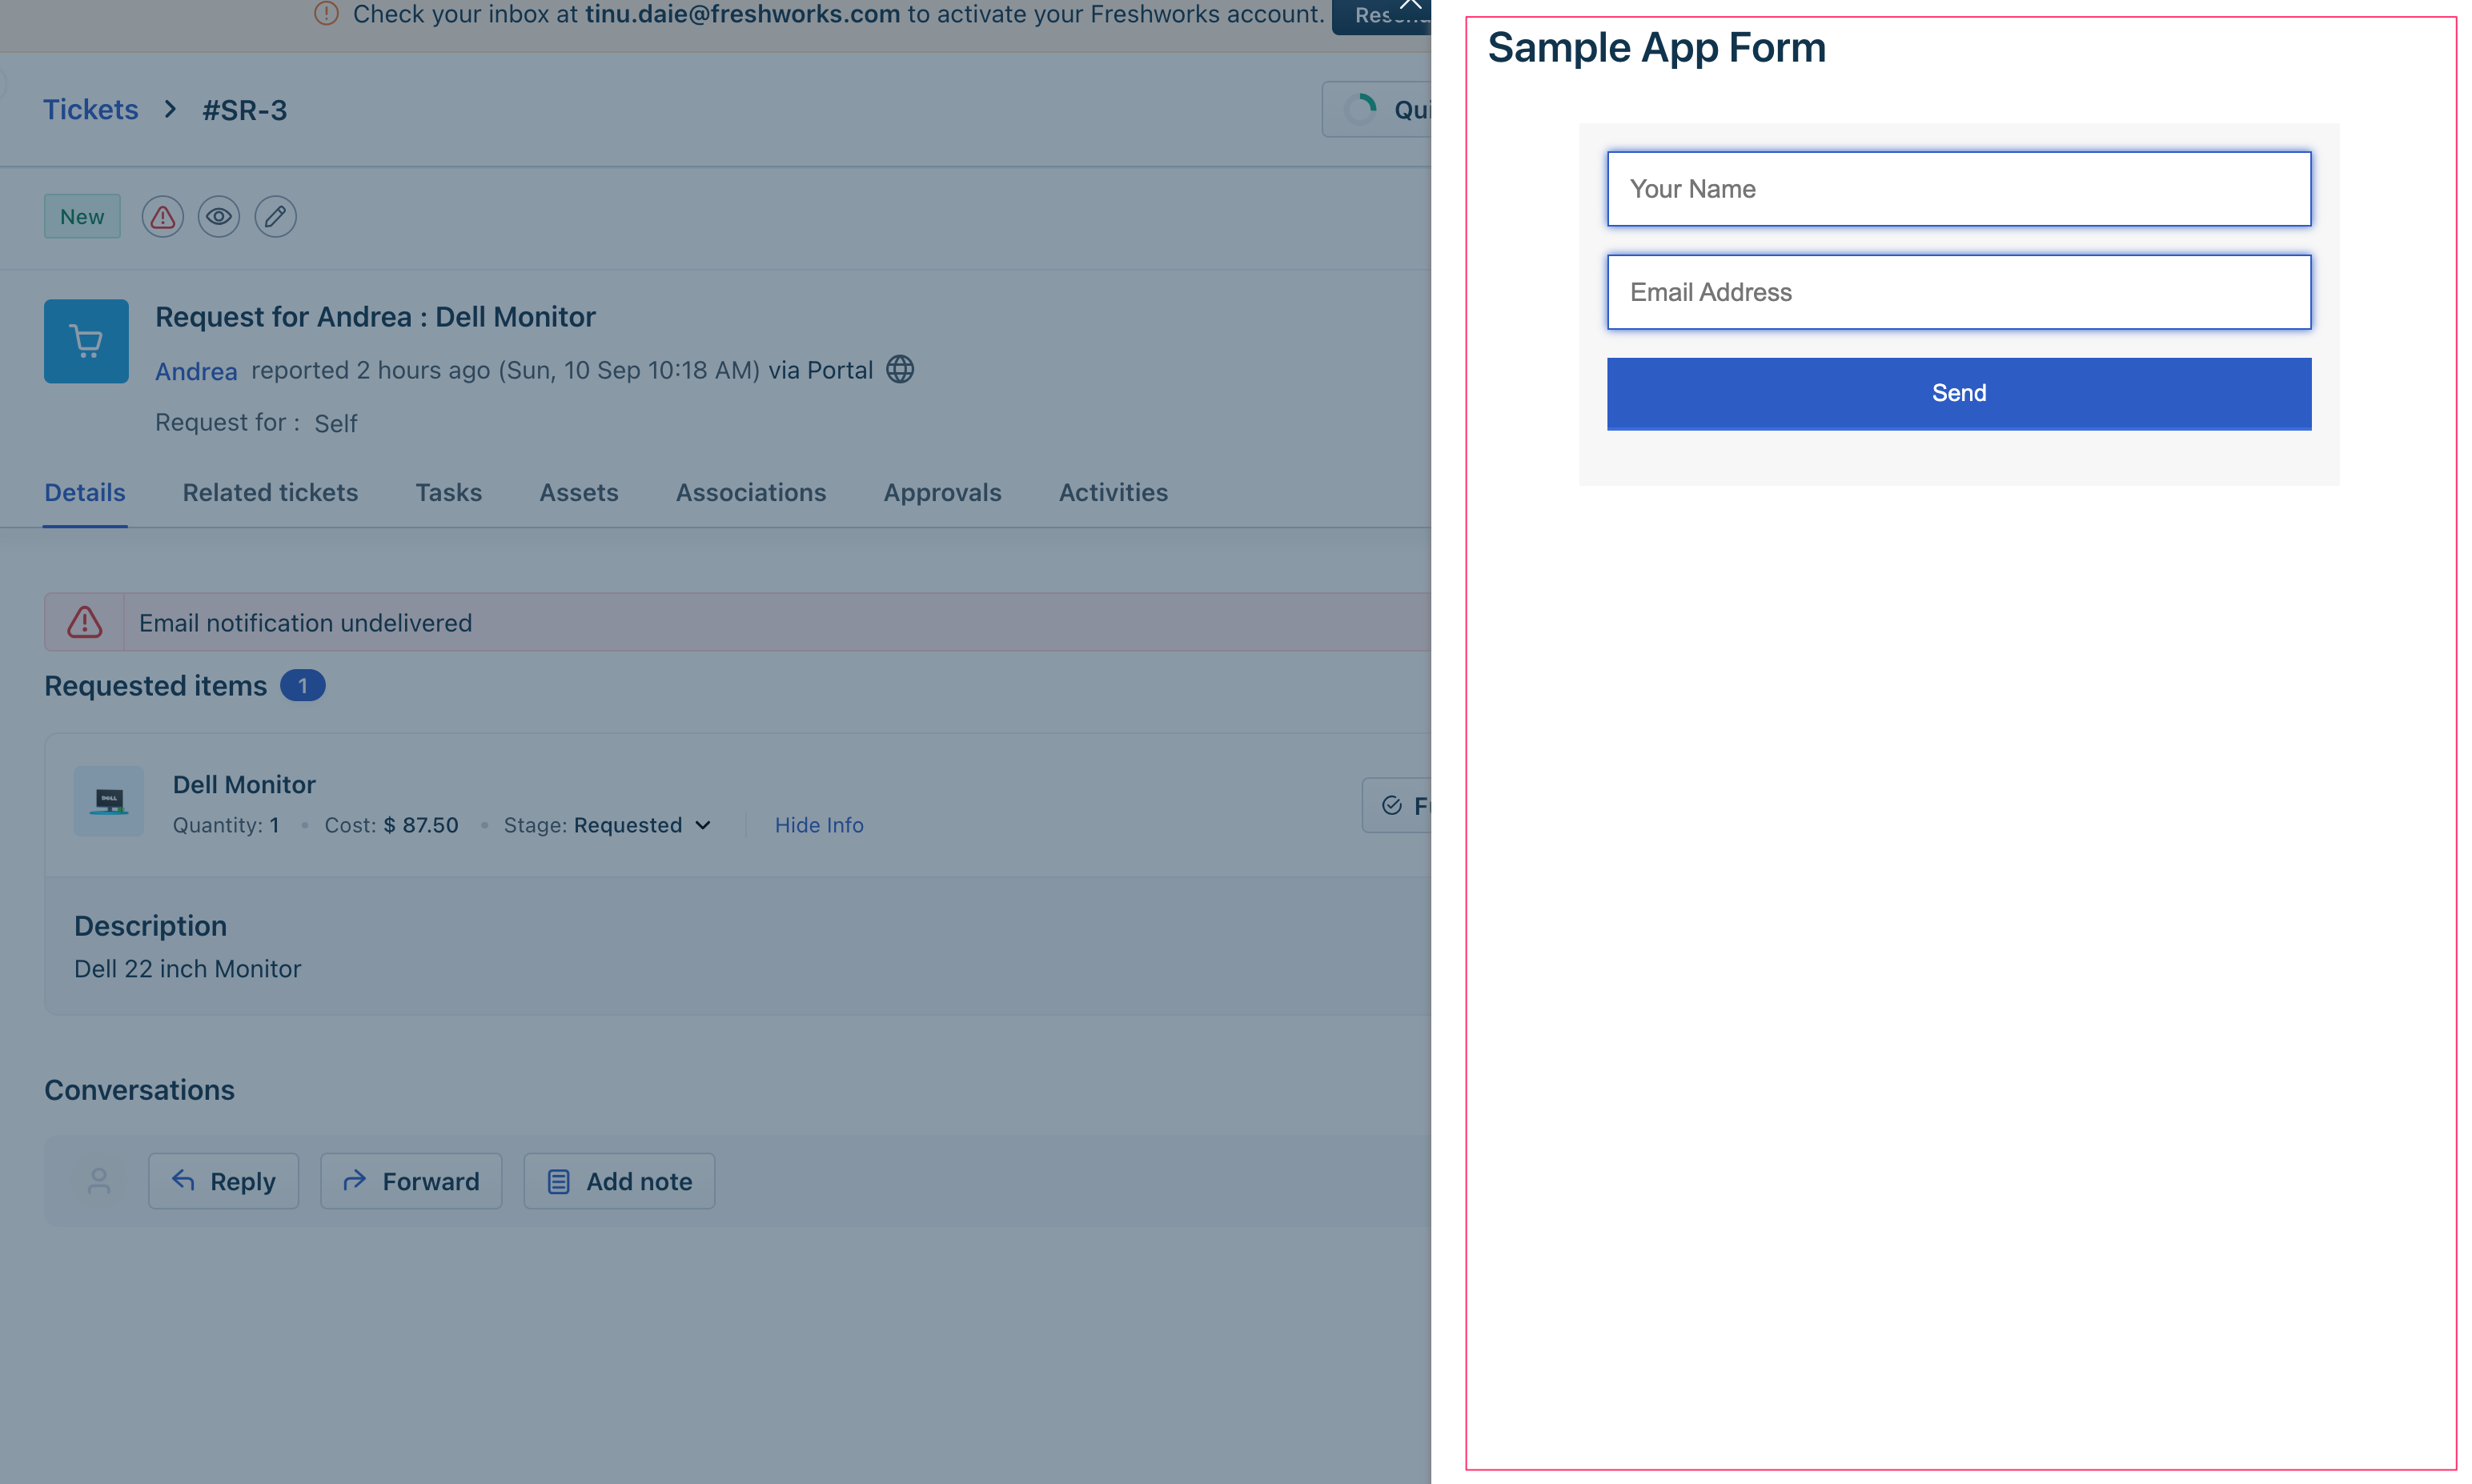 Modal dialog box
Use the sample code shown on the right pane, to enable your app to display a Modal, as part of the app logic.
You can retrieve the contextual information pertaining to the parent location from where a modal is triggered by using Instance method - Context. You can use the Instance methods - Send and Receive to enable communication between modals and any other app instance.
Display confirmation messages
To enable your app to display standard confirmation-message boxes,
- Navigate to the app.js file. Subscribe to the app.initialized event, through an event listener. When the app is initialized, the parent application (the product on which the app is deployed) passes a client reference to the app.
- After app initialization, to display a confirmation message with default buttons, use the following method:
 client.interface.trigger("showConfirm", {
   title: "<Confirmation box name>",
   message: "<text message to be displayed seeking confirmation>"
 })
showConfirm method
The method displays a confirmation message box with a title, a message, and the save and cancel buttons. By default, the message box displays the SAVE and CANCEL buttons. You can customize the button names.
Time-out information:Timeout for Confirmation message box is 10 seconds.
Use the sample code shown on the right pane > Default buttons tab, to enable your app to display a Confirmation message box (with SAVE and CANCEL buttons), as part of the app logic.
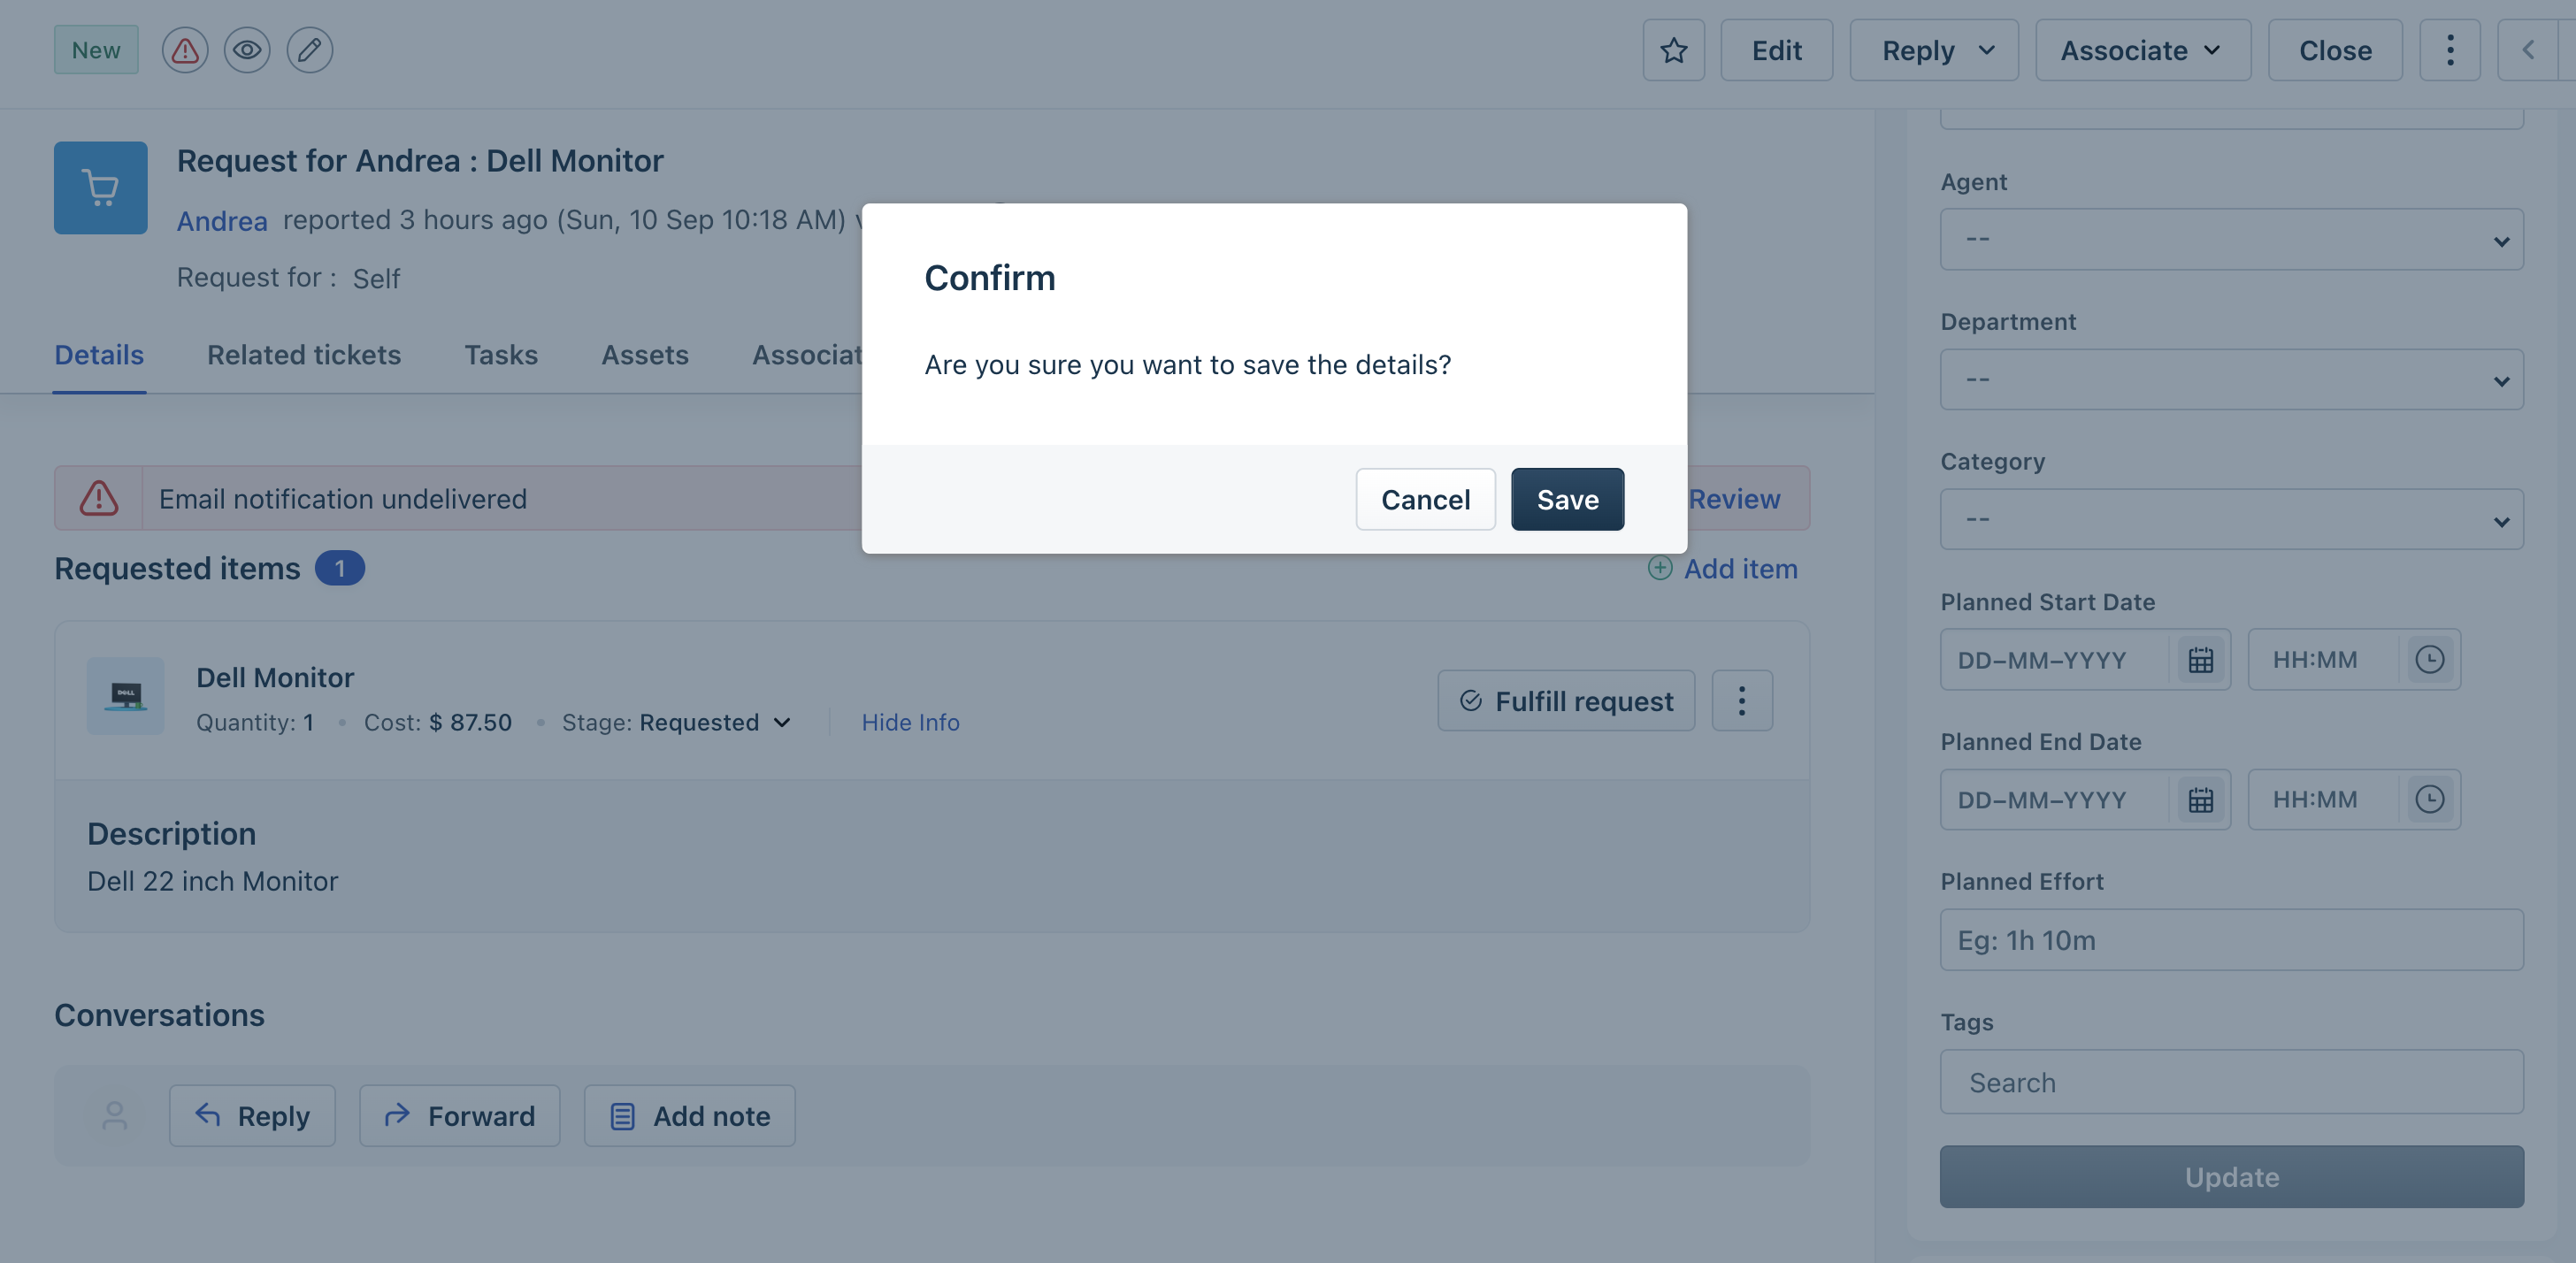 Confirmation message box - Default buttons
Display notifications
To enable your app to display notifications,
Navigate to the app.js file. Subscribe to the app.initialized event, through an event listener. When the app is initialized, the parent application (the product on which the app is deployed) passes a client reference to the app.
After app initialization, to display a notification, use the following method:
Sample app.jsclient.interface.trigger("showNotify", { type: “<Possible values: info, success, warning, error>”, title: "<Display name>", message: "<text message to be displayed in the notification box>" } )
showNotify method
The method displays a notification box with a title and notification message (can be which, if ignored, can fail the system).
Use the sample code shown on the right pane, to enable your app to display various notification messages, as part of the app logic.
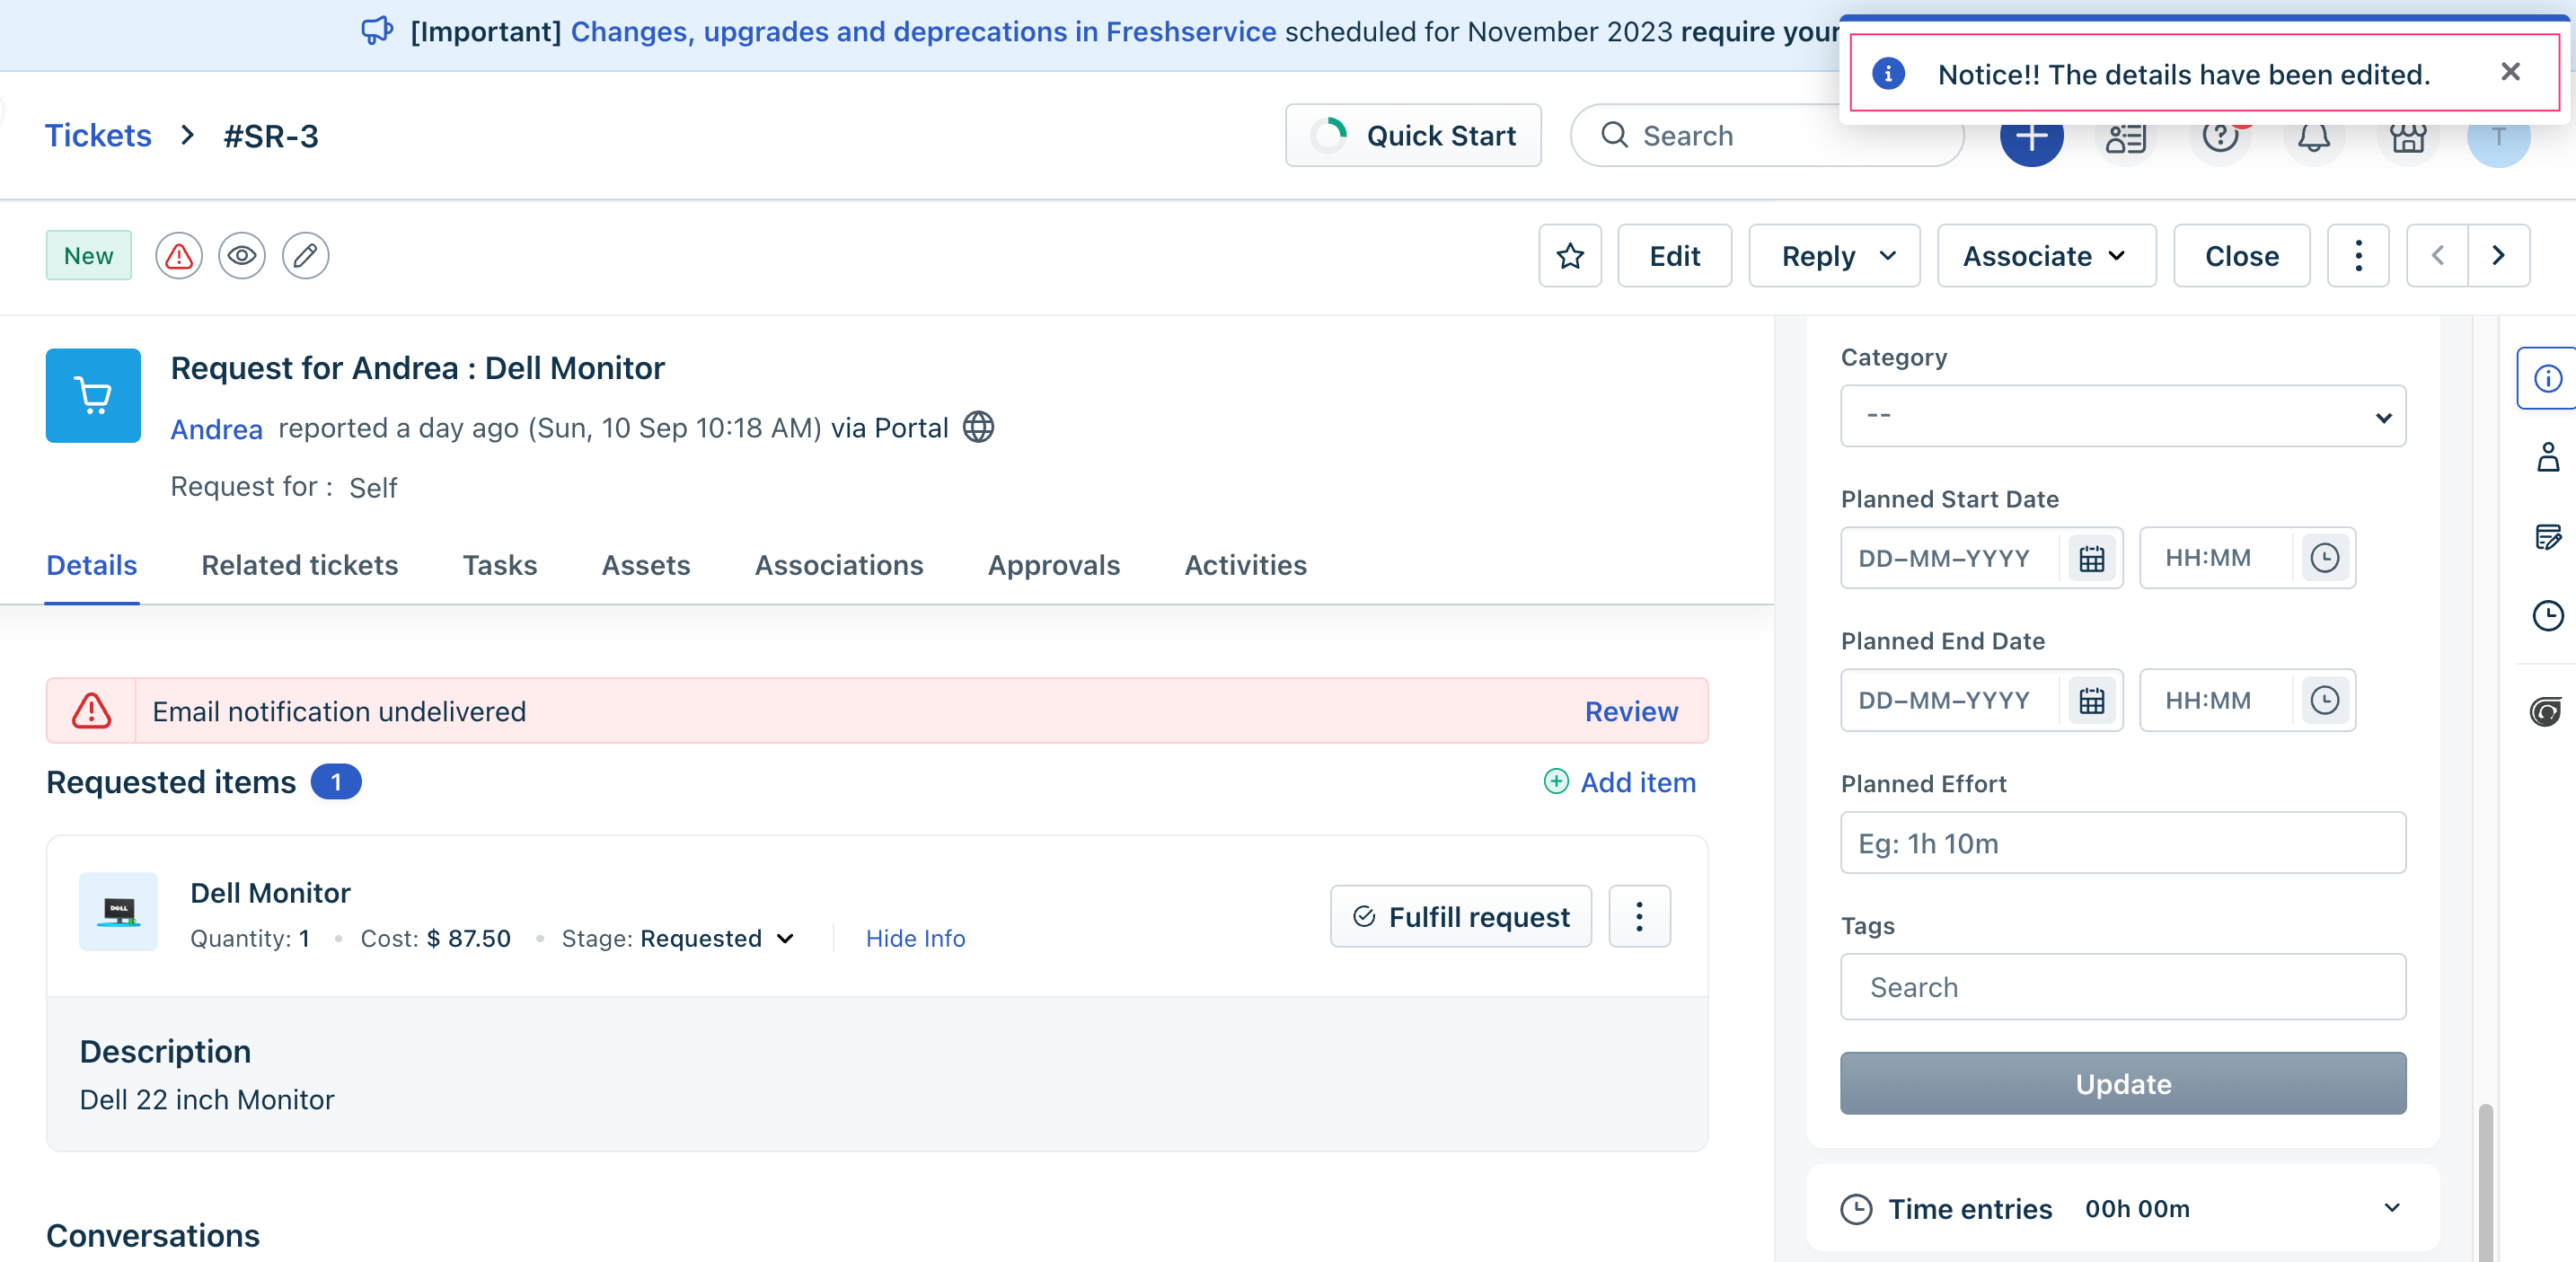 Notification box with an info message
CTI dialler widget- possible app actions
An app deployed at the cti_global_sidebar can display these interfaces on any of the Freshservice pages.
Display or hide CTI dialler
To enable an app deployed at the cti_global_sidebar to open or hide a phone dialler,
- Navigate to the app.js file. Subscribe to the app.initialized event, through an event listener. When the app is initialized, the parent application (product on which the app is deployed) passes a client reference to the app.
- After app initialization, to open or hide the dialler in an iFrame, use the following method:Sample app.js
client.interface.trigger("<showCtiElement or hideCtiElement>", {
  id: "softphone"
})
show or hide method - for diallerFreshserviceFreshservice for MSPs
Use the sample codes shown on the right pane, to enable your CTI app to open or hide the phone dialler in an iFrame.
Display or hide missed calls
To enable an app deployed at the cti_global_sidebar to display or hide the number of missed calls on the CTI widget,
Navigate to the app.js file. Subscribe to the app.initialized event, through an event listener. When the app is initialized, the parent application (product on which the app is deployed) passes a client reference to the app.
After app initialization, to display or hide the number of missed calls, use the following method:
Sample app.jsShow missed callsHide missed callsclient.interface.trigger("<showCtiElement>", { id: "missedCall", value: <number-of-missed-calls> })
show or hide method - for the number of missed calls on the CTI widgetFreshserviceFreshservice for MSPsFreshservice for business teams
Use the sample codes shown on the right pane, to enable your CTI app to display or hide the number of missed calls on the CTI widget.
Note:value is the number of missed calls that needs to be displayed on the CTI widget, specified as an integer.
Open ticket details page
To enable your app to open the ticket details pages,
Navigate to the app.js file. Subscribe to the app.initialized event, through an event listener. When the app is initialized, the parent application (product on which the app is deployed) passes a client reference to the app.
After app initialization, to open the ticket details page, use the following method:
Sample app.jsclient.interface.trigger("openTicket", { id: "<id of the ticket to be opened>" })
openTicket methodFreshserviceFreshservice for MSPsFreshservice for business teams
The method opens the ticket details page of a specific ticket. Use the sample code shown on the right pane, to enable your app to open the ticket details page.
Open requester details page
To enable your app to open the requester details pages,
Navigate to the app.js file. Subscribe to the app.initialized event, through an event listener. When the app is initialized, the parent application (product on which the app is deployed) passes a client reference to the app.
After app initialization, to open the requester details page, use the following method:
Sample app.jsclient.interface.trigger("openRequester", { id: "<id of the requester>" })
openRequester methodFreshserviceFreshservice for MSPsFreshservice for business teams
The method opens the requester details page of a specific requester. Use the sample code shown on the right pane, to enable your app to open the requester details page.